运用于服务器、应用、网站需要vpn才能访问的场景的openVPN搭建
# 背景/原理
A服务器正常公网访问或开放VPN端口即可,解析VPN域名至该服务器
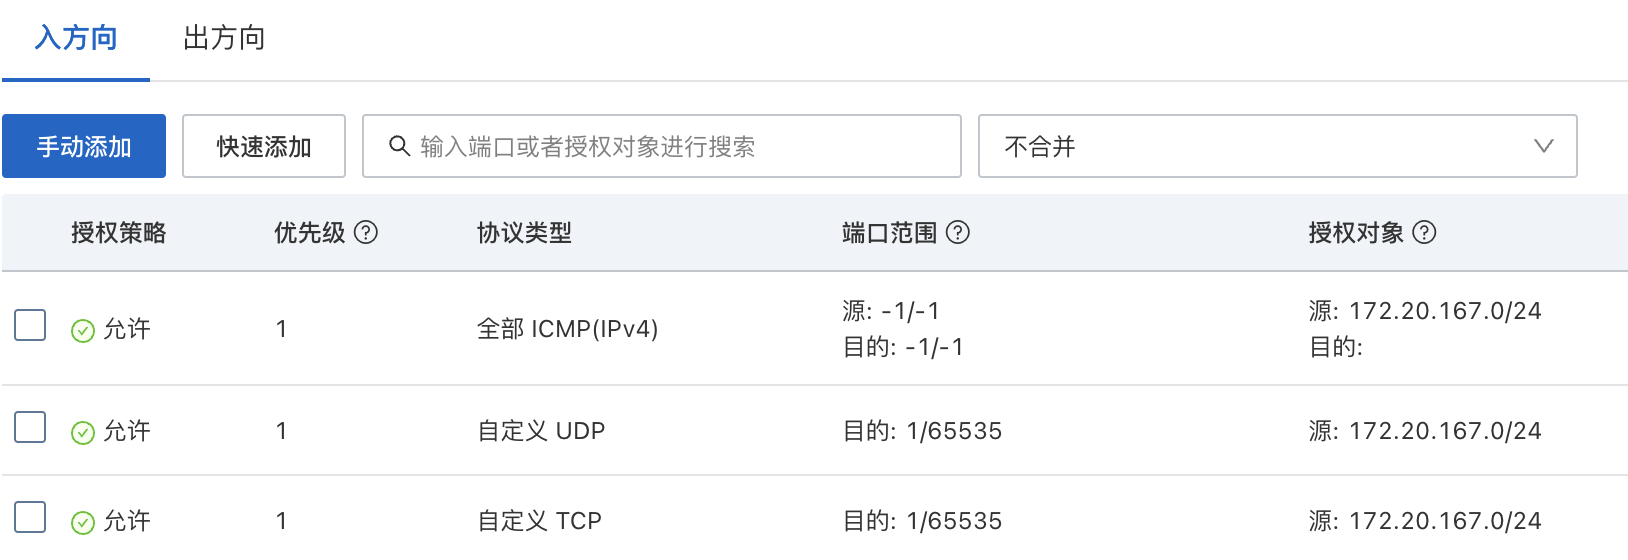
B服务器安全组入口方设置禁止公网访问,允许内网访问或者允许A服务器的安全组访问,这样在A服务器能服务B服务器,A服务器安装VPN,用户连接VPN后通过A服务器就能代理访问A/B两台服务器的公网/内网IP(需要防护的域名就可以解析至2台服务器的内网IP或B服务器的公网IP)
# 准备环境
# 2台阿里云服务器Ubantu@20
安装 zsh git python

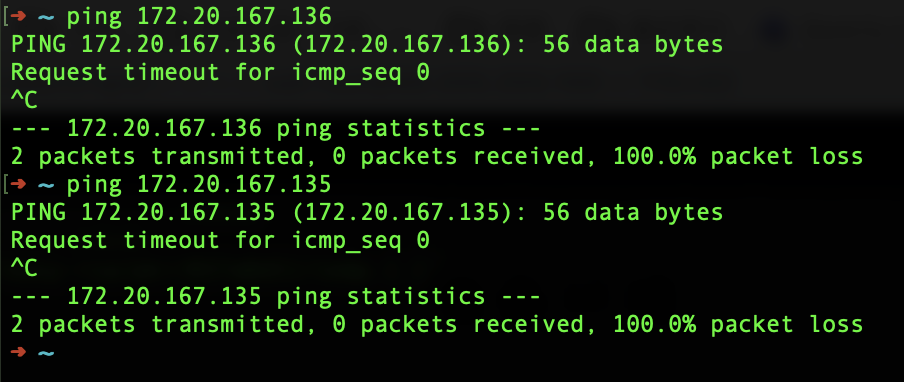
# 设置好安全组后,ping两台服务器内网ip将无法连接


# 安装openvpn
openvpn有很多种安装方式
1.docker openvpn
https://openvpn.net/vpn-server-resources/docker-quick-start-guide/
https://github.com/kylemanna/docker-openvpn
2.openvpn-install脚本
https://github.com/Nyr/wireguard-install
3.openVPN镜像
4.第三方openVPN docker镜像
https://www.metahubs.cn/openvpn
4.openVPN GUI
https://github.com/bnhf/openvpn-admin-plus
https://github.com/adamwalach/openvpn-web-ui
https://github.com/Chocobozzz/OpenVPN-Admin
本次使用openvpn-install脚本,下载openvpn-install脚本,设置可执行权限后,执行
hostname可以设置域名,域名解析至VPN服务器IP
第一次执行脚本走安装流程
wget https://raw.githubusercontent.com/Nyr/openvpn-install/master/openvpn-install.sh
chmod 755 openvpn-install.sh
./openvpn-install.sh

Welcome to this OpenVPN road warrior installer!

This server is behind NAT. What is the public IPv4 address or hostname?
Public IPv4 address / hostname [60.205.255.100]:

Which protocol should OpenVPN use?
   1) UDP (recommended)
   2) TCP
Protocol [1]: 1

What port should OpenVPN listen to?
Port [1194]:

Select a DNS server for the clients:
   1) Current system resolvers
   2) Google
   3) 1.1.1.1
   4) OpenDNS
   5) Quad9
   6) AdGuard
DNS server [1]: 1

Enter a name for the first client:
Name [client]: a1
...
Finished!
# 生成一个ovpn证书
第二次执行脚本走添加用户、删除用户、卸载VPN流程
OpenVPN is already installed.

Select an option:
   1) Add a new client
   2) Revoke an existing client
   3) Remove OpenVPN
   4) Exit
Option: 1
...
a2 added. Configuration available in: /root/a2.ovpn
# 设置非全局代理
# 1.修改server.conf
# 注释redirect-gateway def1,这是server推送客户端全局代理
#push "redirect-gateway def1 bypass-dhcp"
# 添加一个指定路由代理方式vpn_gateway,172.20.167.0是内网地址
push "route 172.20.167.0 255.255.255.0 vpn_gateway"
# 2.重启openVPN
systemctl restart openvpn-server@server
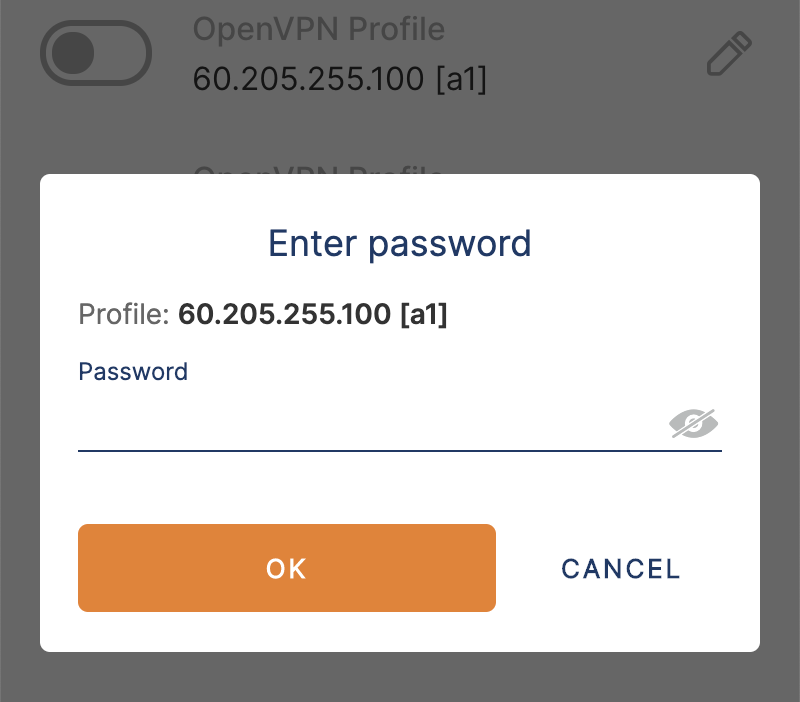
# 使用账号密码登陆
openVPN默认无需账号密码,在server.conf中可以配置校验(需要自行写校验脚本)或者ldap插件校验
# 1.创建校验脚本checkpsw.sh
vim /etc/openvpn/checkpsw.sh

#!/bin/sh
###########################################################
# checkpsw.sh (C) 2004 Mathias Sundman <mathias@openvpn.se>
#
# This script will authenticate OpenVPN users against
# a plain text file. The passfile should simply contain
# one row per user with the username first followed by
# one or more space(s) or tab(s) and then the password.

PASSFILE="/etc/openvpn/psw-file"
LOG_FILE="/etc/openvpn/openvpn-password.log"
TIME_STAMP=`date "+%Y-%m-%d %T"`

###########################################################

if [ ! -r "${PASSFILE}" ]; then
  echo "${TIME_STAMP}: Could not open password file \"${PASSFILE}\" for reading." >> ${LOG_FILE}
  exit 1
fi

CORRECT_PASSWORD=`awk '!/^;/&&!/^#/&&$1=="'${username}'"{print $2;exit}' ${PASSFILE}`

if [ "${CORRECT_PASSWORD}" = "" ]; then
  echo "${TIME_STAMP}: User does not exist: username=\"${username}\", password=\"${password}\"." >> ${LOG_FILE}
  exit 1
fi

if [ "${password}" = "${CORRECT_PASSWORD}" ]; then
  echo "${TIME_STAMP}: Successful authentication: username=\"${username}\"." >> ${LOG_FILE}
  exit 0
fi

echo "${TIME_STAMP}: Incorrect password: username=\"${username}\", password=\"${password}\"." >> ${LOG_FILE}
exit 1
# 2.设置可执行权限
chmod 755 /etc/openvpn/checkpsw.sh
# 3.添加校验脚本的校验文件psw-file
echo 'username1 password1' >> /etc/openvpn/psw-file
# 4.编辑server.conf
# 追加以下内容
script-security 3
auth-user-pass-verify /etc/openvpn/checkpsw.sh via-env
username-as-common-name
verify-client-cert none
# 5.重启openVPN
systemctl restart openvpn-server@server
# 6.修改客户端文件xxx.ovpn
# 追加以下内容,<cert>和<key>部分可以删掉
auth-user-pass
# 7.使用
客户端下载地址:https://openvpn.net/client/

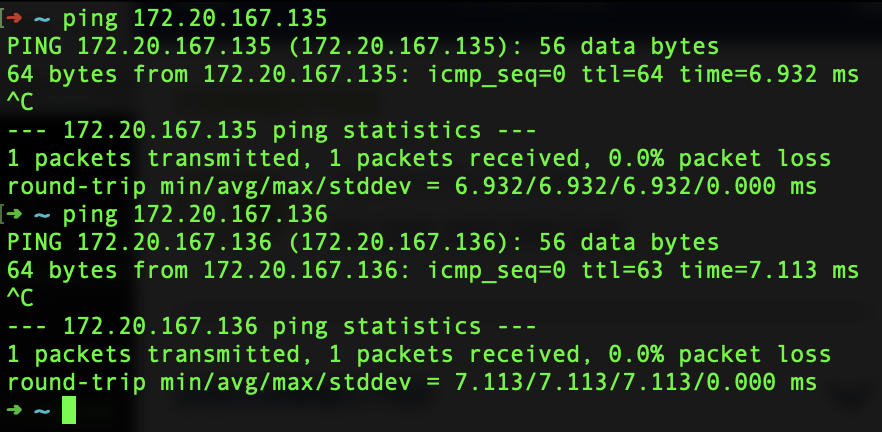
# 8.ping A/B服务器的内网ip
返回正常

# 参考
一键安装 openvpn 并配置使用账号密码登陆
https://www.soulchild.cn/post/1782/

OpenVPN AS:基于web管理OpenVPN服务
https://devopsman.cn/archives/openvpnas-ji-yu-web-guan-li-openvpn-fu-wu#%E5%AE%89%E8%A3%85openvpn%E6%9C%8D%E5%8A%A1

OpenVPN使用疑难杂症总结
https://devopsman.cn/archives/openvpn-shi-yong-yi-nan-za-zheng-zong-jie

OpenVPN 设置非全局代理
https://blog.kagamikun.com/archives/openvpnshe-zhi-fei-quan-ju-dai-li
^_^ Be the first to comment.


Comment
Nickname
Email (Reply notice)
Website
Content (can use Markdown syntax)